Create Objects
An object is a fundamental entity in your event store, representing "something" that moves through your process and is associated with activities. Common examples of objects include orders, shipments, and customers. To create an event log, you need at least one object. This page outlines how to create an object.
Step 1: Create a New Object
- Open the Dashboard (1).
- Select Create, then Objects (2).
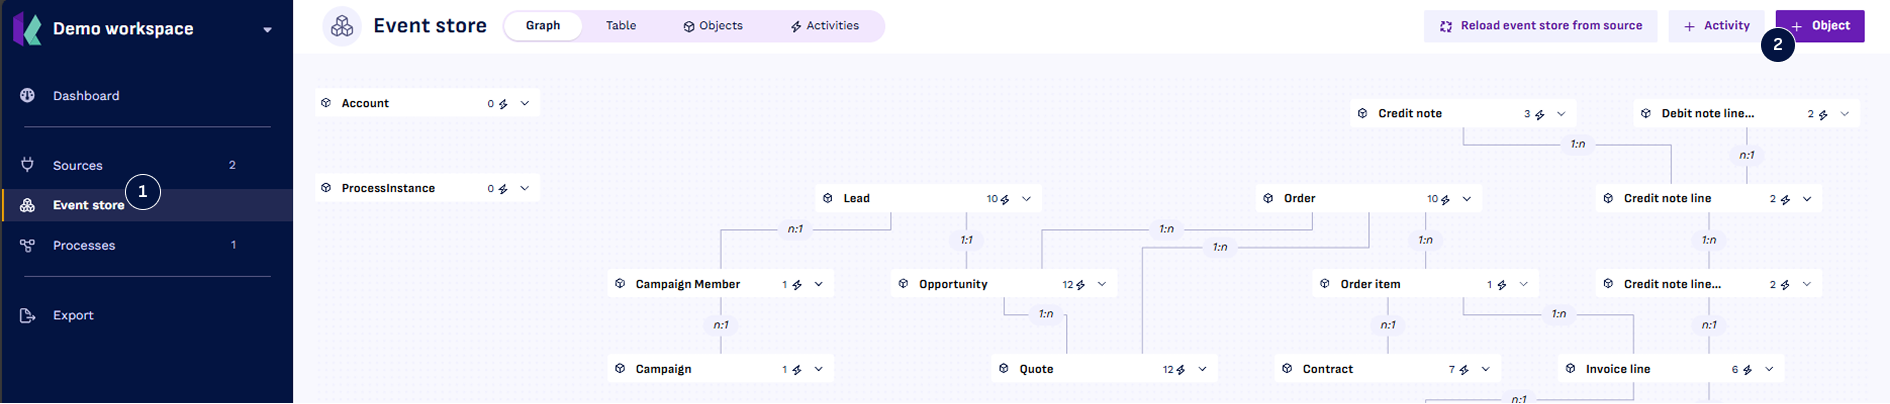
You can also create an object from the Event store page, with the Object button. The dashboard is where most models start, but once you are working in the tables it is often quicker to add one from there.
Step 2: Select Source (Table & Identifier)
- Fill in the key fields of the object. See the table below for additional information.
- Click
Create draft object.
Object Key Field Details
| Field | Details |
|---|---|
| Source | The table containing the object instances. |
| Object name | The name used throughout Konekti to refer to this object. |
| Object identifier | The column (or columns) uniquely identifying each row in the object table. Should result in a unique identifier for each row. If not, an error will occur during object processing. |
Step 3: Configure Object Details
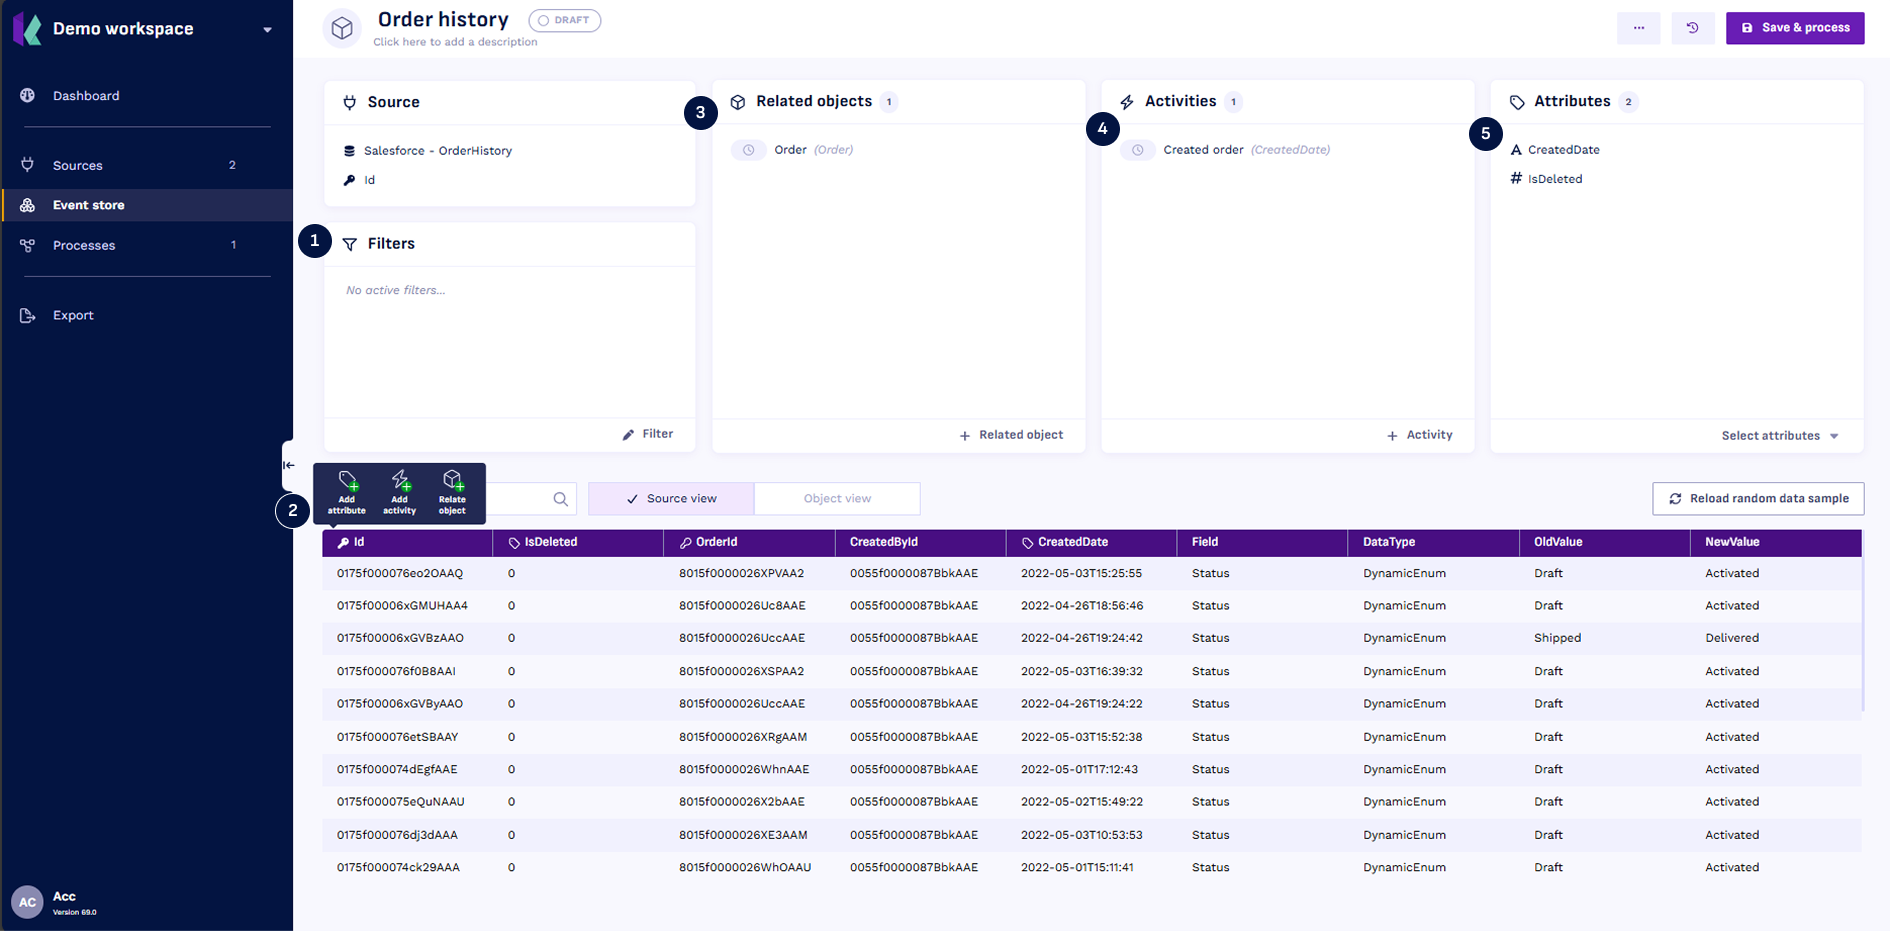
- Select Filters if not every row of the table is an instance of the object. Add and edit filters using the
 Filter button.
- Explore sample data in the Source View. Hover over a column name and use the Quick Action Toolbar for key actions:
- Relate Objects using either join keys or advanced join keys ; in the example below, order_id is the join key to the object Order.
- Add Activities for timestamp columns; in the example below, created_date_time is the timestamp of the activity Create Order Line.
- Add Attributes for analysis; for example amount_usd and spend_category. To add an attribute by manipulating existing column(s), refer to Calculated Attributes.
- Review
 Related objects to ensure all expected direct relations are present.
- Review
 Activities for other activities related to the object.
- Review
 Attributes for necessary attributes and rename them using the edit icon.
Step 4: Process Object
- Select
Save & processto complete the object creation.
Once processed, the object is ready for use throughout Konekti.
Not sure what to add next? Your draft objects and activities are listed on the Event store page, where the Status column shows what is still a draft and what has already been processed.