1. Fast track
In this tutorial you build your first event log from sample data in four steps:
- Upload the sample data as a source.
- Load a blueprint that creates the objects and activities.
- Create a process on top of those objects.
- Download the event log as a CSV file.
The next tutorial shows how to add objects and activities yourself. Read the introduction first if you are new to the core concepts.
The application-to-loan process
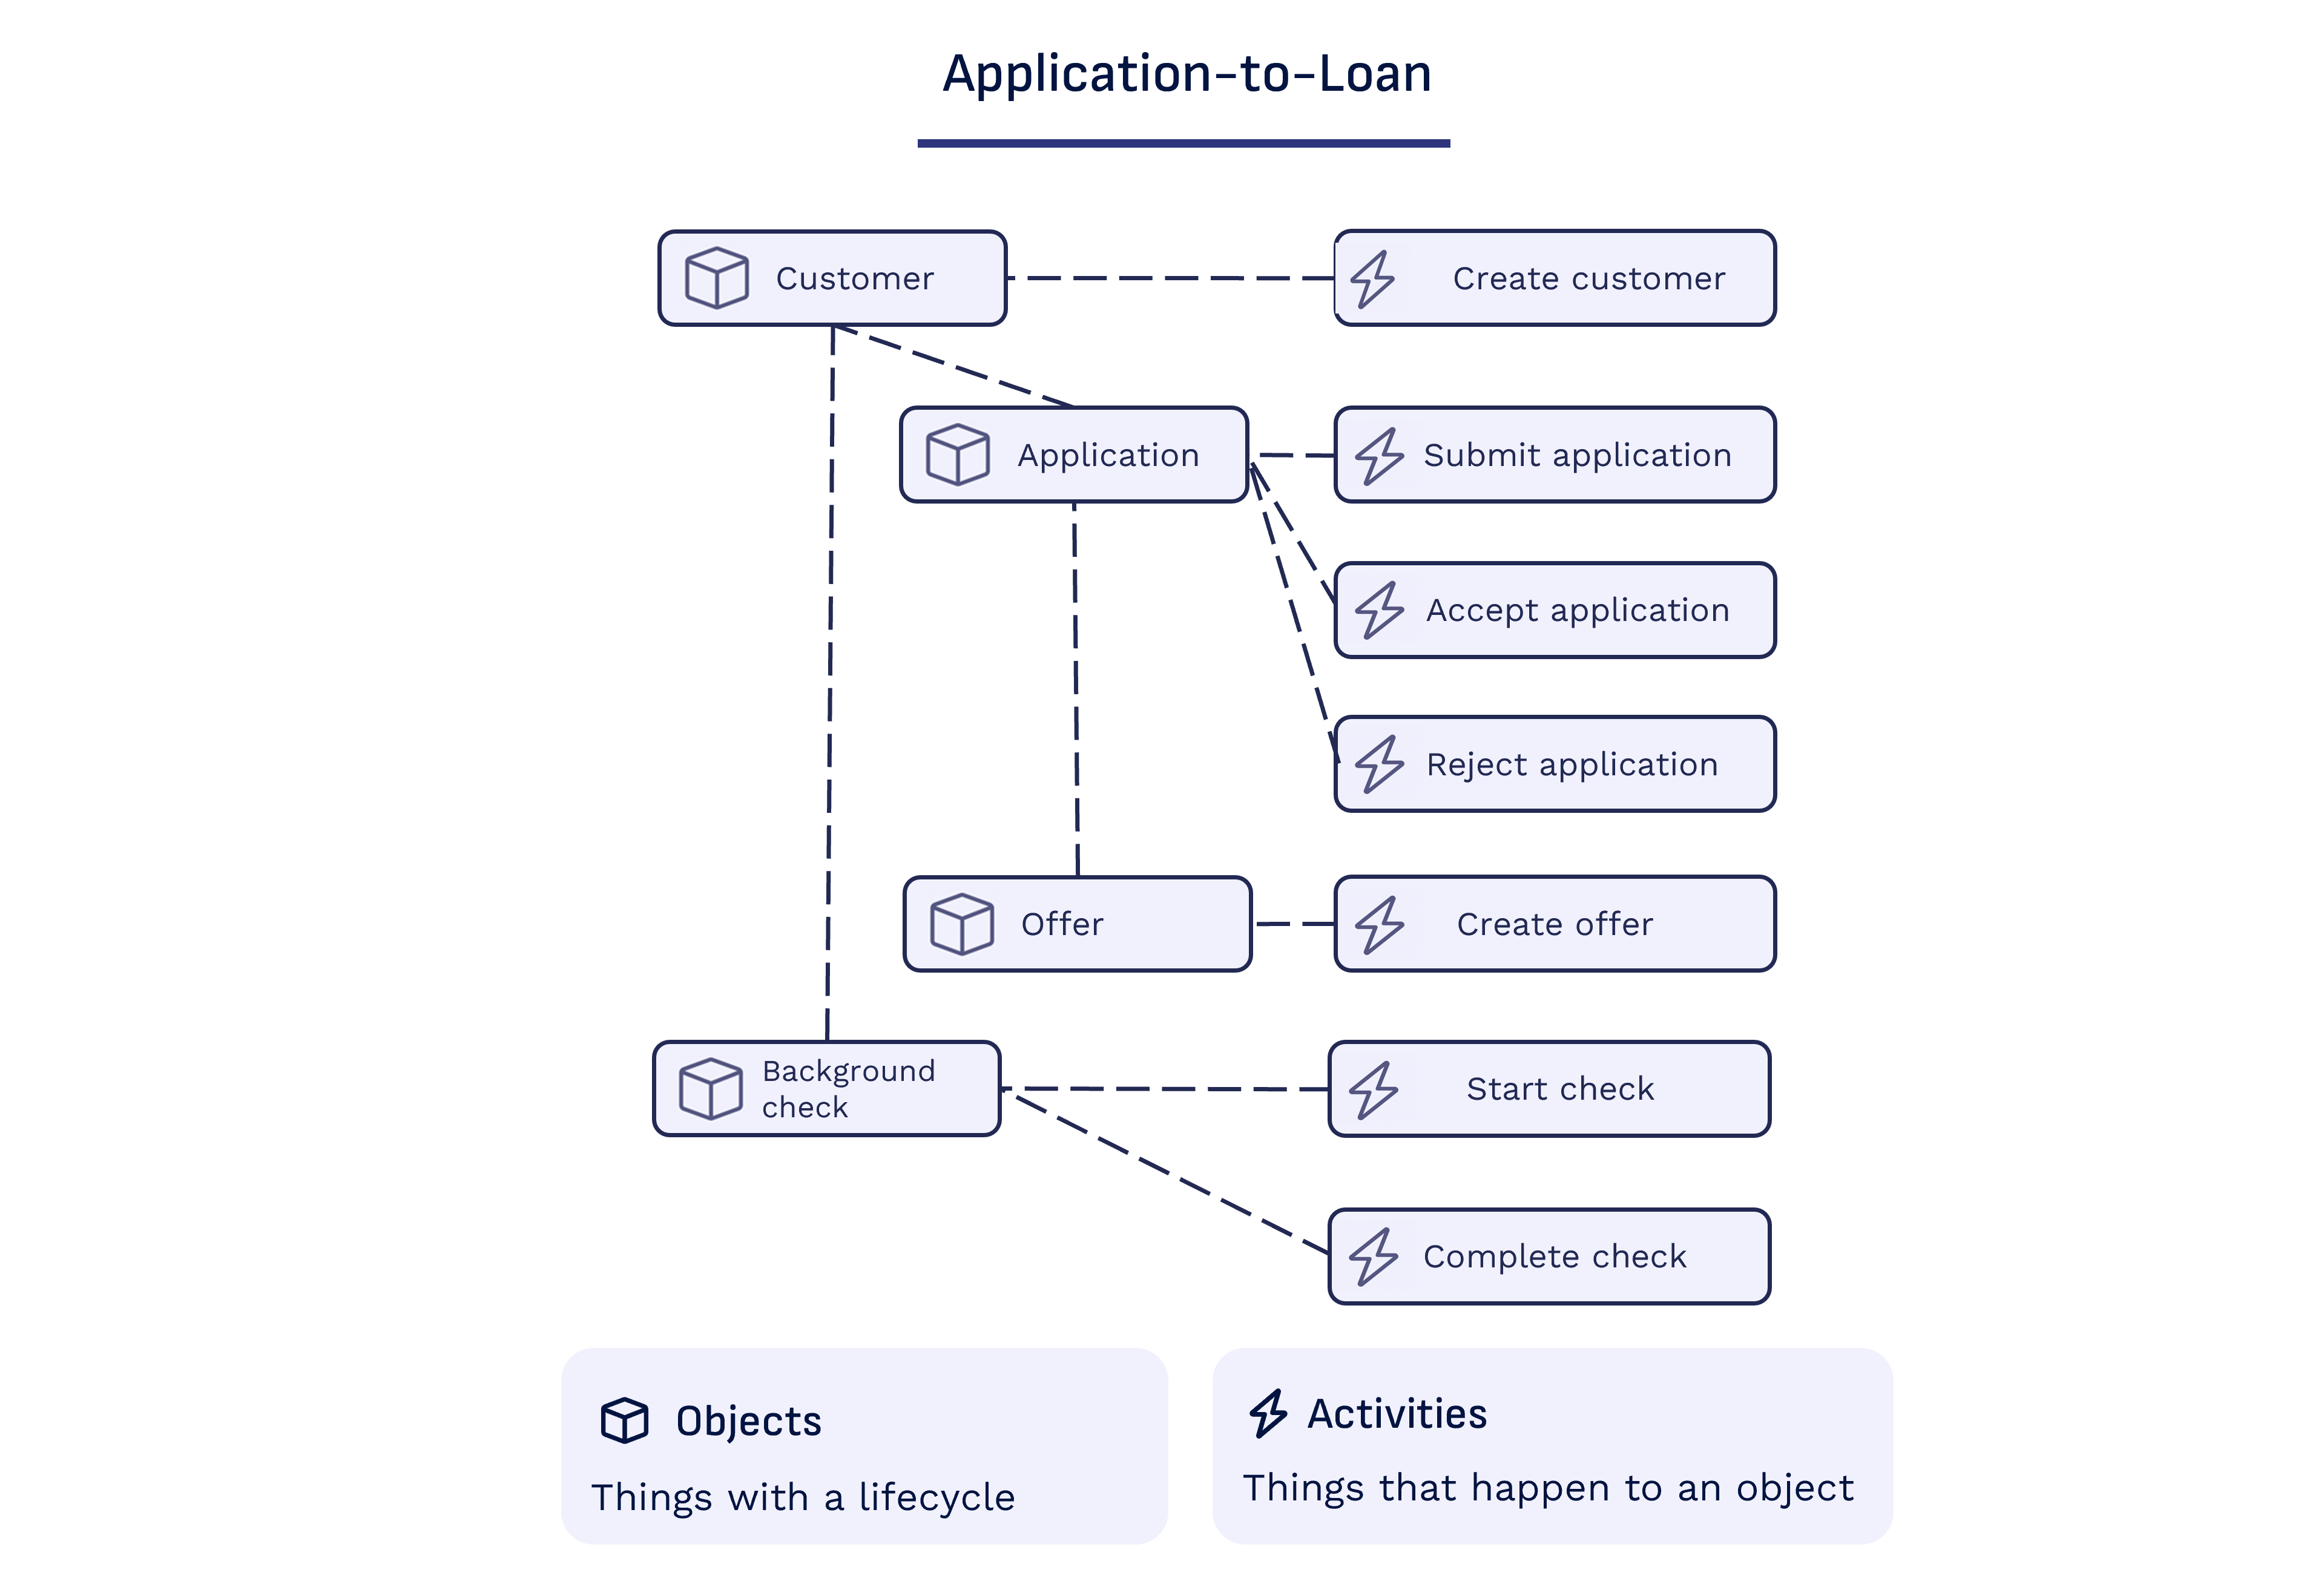
The sample data describes the loan application process at Secure Bank:
- Application submission: a Customer submits an Application for a loan, which is accepted or rejected.
- Offer generation: an accepted application gets an Offer.
- Background check: an offer is only sent after a positive Background check.
Each of these is an object with its own activities. In this tutorial you create an event log with Application as the leading object, so every case follows one application. The blueprint covers Application, Customer and Offer; you add Background check in the next tutorial.
Step 0: Create a training account
All four tutorials run on the Konekti training environment. When you create a training account, two workspaces are set up for you:
- Tutorial 1 & 2 - your user name: for tutorial 1, Fast track, and tutorial 2, Building the data model.
- Tutorial 3 & 4 - your user name: for tutorial 3, In depth processes, and tutorial 4, Advanced modeling.
The training environment is for the tutorials only. Do not upload or share any data other than the tutorial files provided on these pages.
You can only create a training account with your company email address, and only once your company's email domain has been whitelisted. To request this, email support@getkonekti.io and ask for your domain to be whitelisted.
- Go to training.getkonekti.io/demo/create-user.
- Create your training account with your company email address.
- Confirm your account with the confirmation email you receive.
- Open the workspace Tutorial 1 & 2 - your user name. You use it for this tutorial and the next one.
Step 1: Upload the files
A source holds the process data your event logs are built from. Here the source is a set of files you upload.
- Download the zip file and unzip it on your computer.
- Select Sources in the sidebar.
- Select + Source.
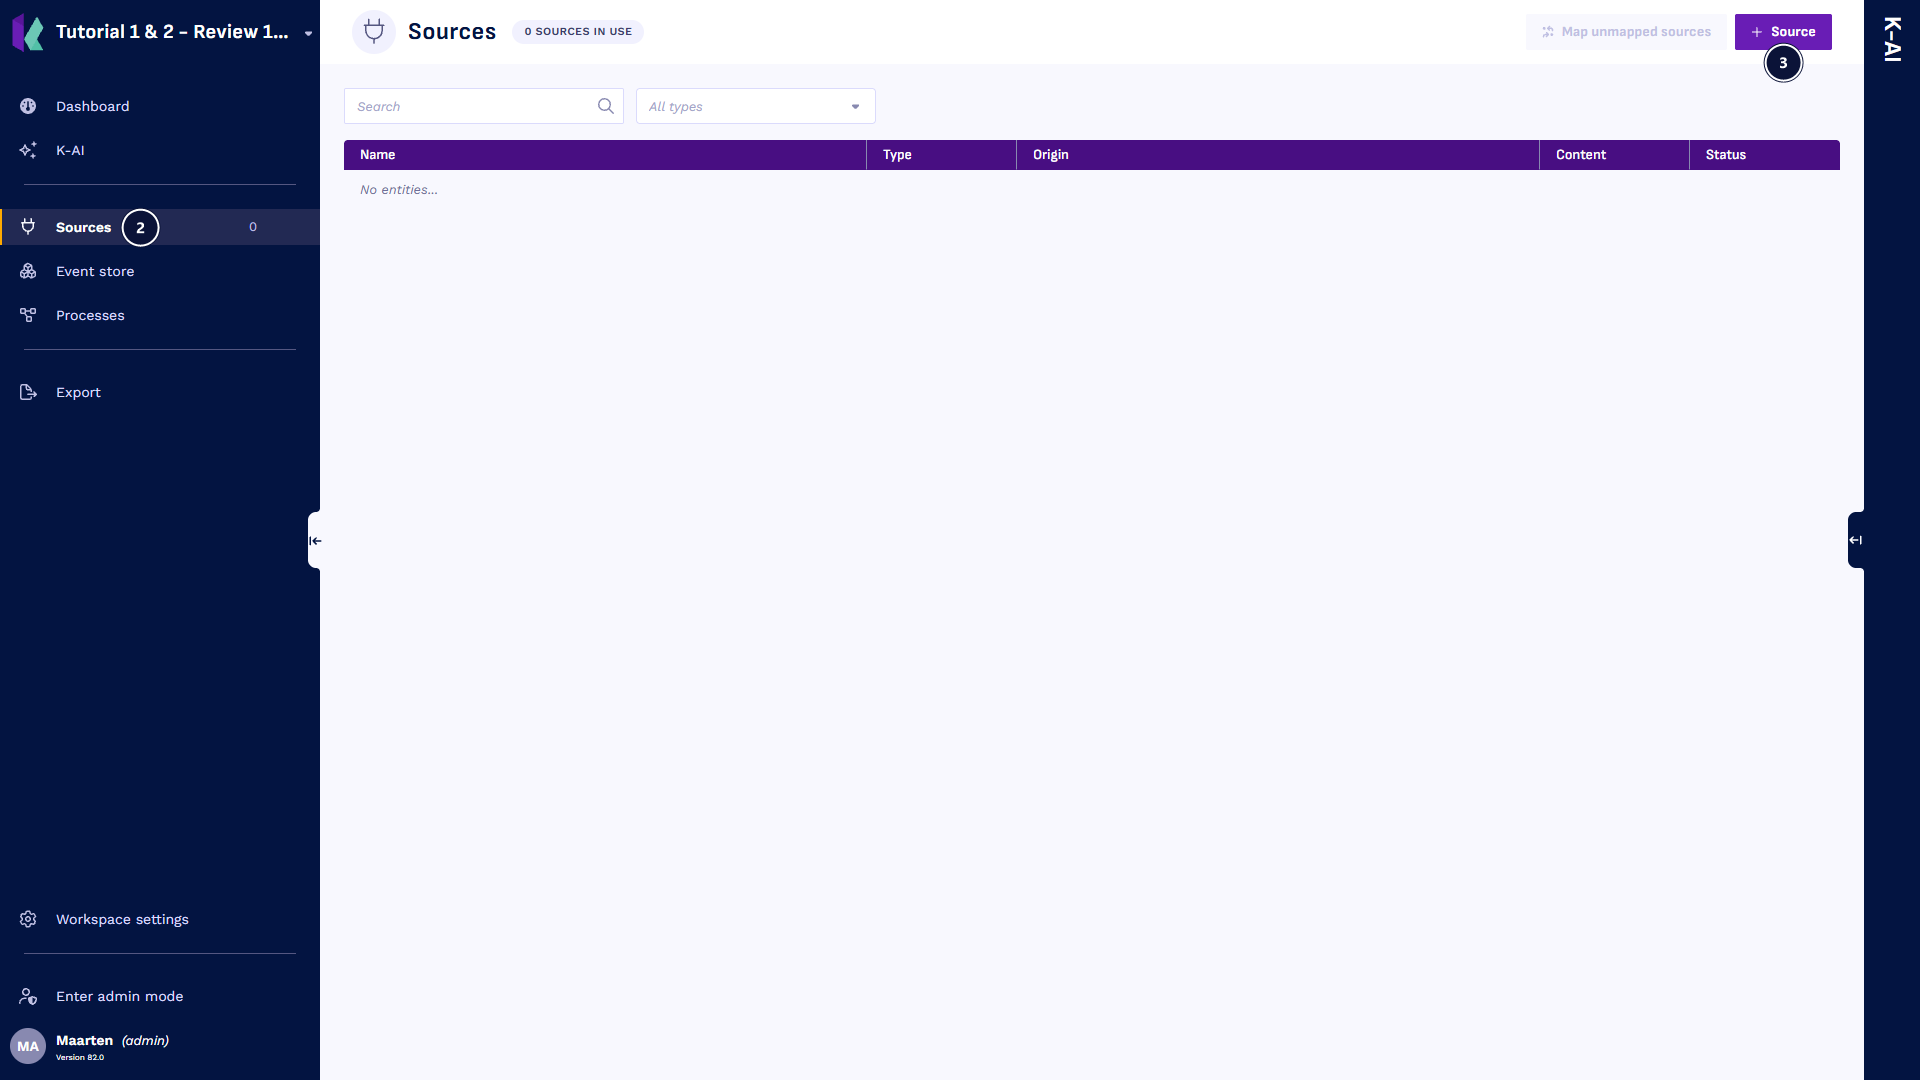
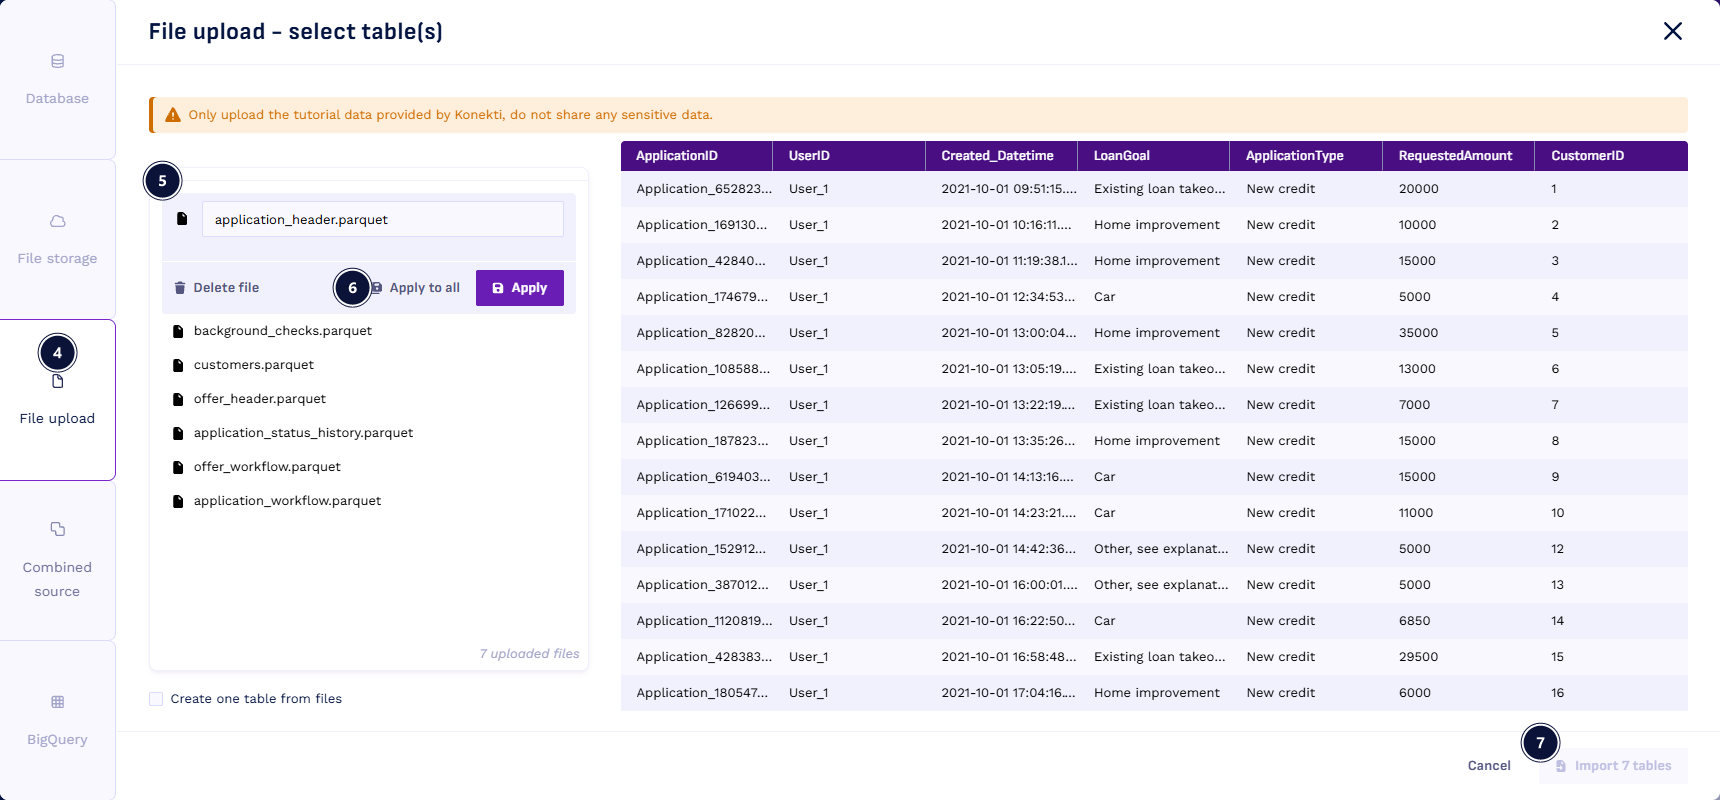
- Select File upload.
- Drag the seven files into the drop zone.
- Select Apply to all to use the default settings for every file. Import 7 tables becomes available once all files have settings.
- Select Import 7 tables.
The import can take up to a minute.
Step 2: Build the event store with a blueprint
The event store holds your process data as objects and activities. A blueprint adds a ready-made set of them in one go. See Important concepts for how the event store works.
- Download the blueprint.
- Select Dashboard in the sidebar.
- Open the blueprint menu, the icon button next to … at the top, and select Load blueprint. In an empty workspace, the Import blueprint card does the same.
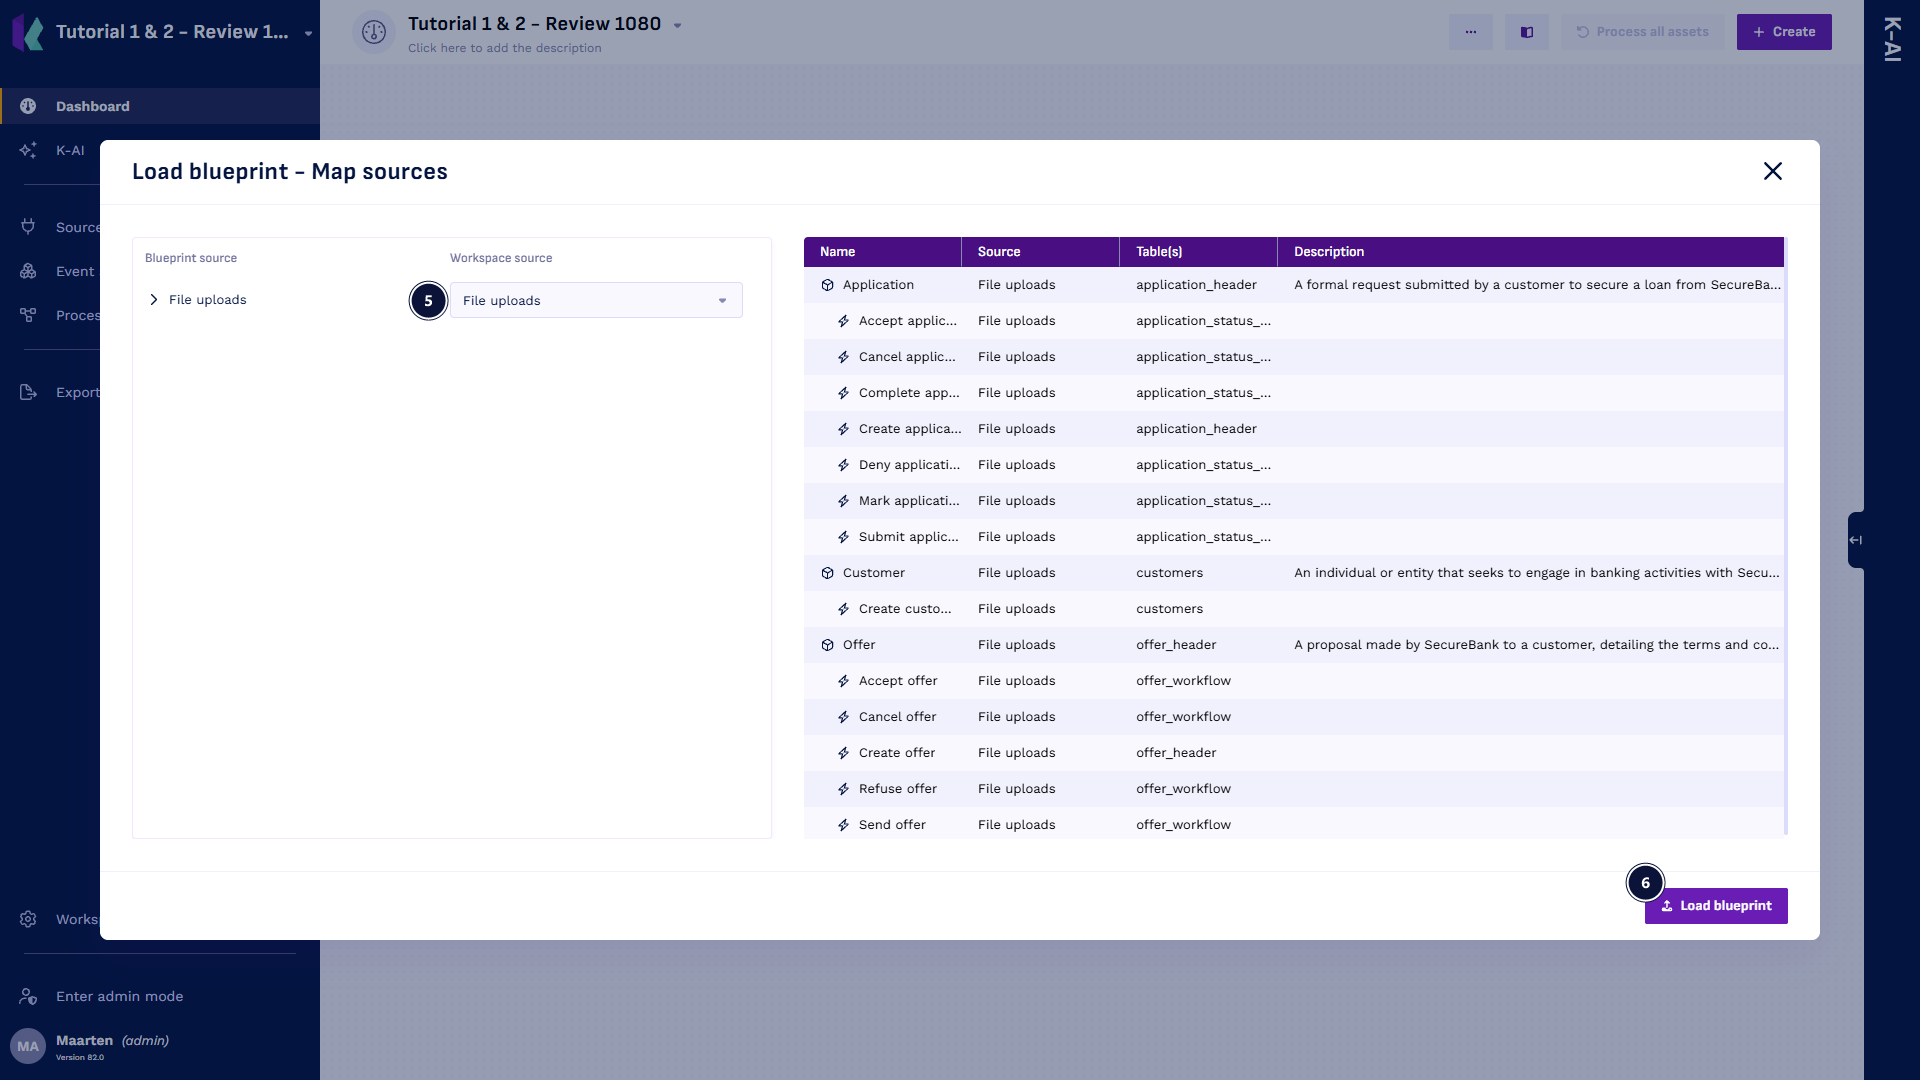
- Drop the .kon file in the Load blueprint dialog, then select Map sources.
- Under Workspace source, choose File uploads so the blueprint reads from the files you uploaded.
- Select Load blueprint.
- Select Event store in the sidebar, select Process all assets, and confirm with Reload assets.
The objects and activities start as Draft and change to Processed once Konekti has built them. Select any of them to see its details.
Step 3: Create a process
An event log comes from a process, which starts from a leading object and adds the objects related to it.
- Select Processes in the sidebar, then + Process.
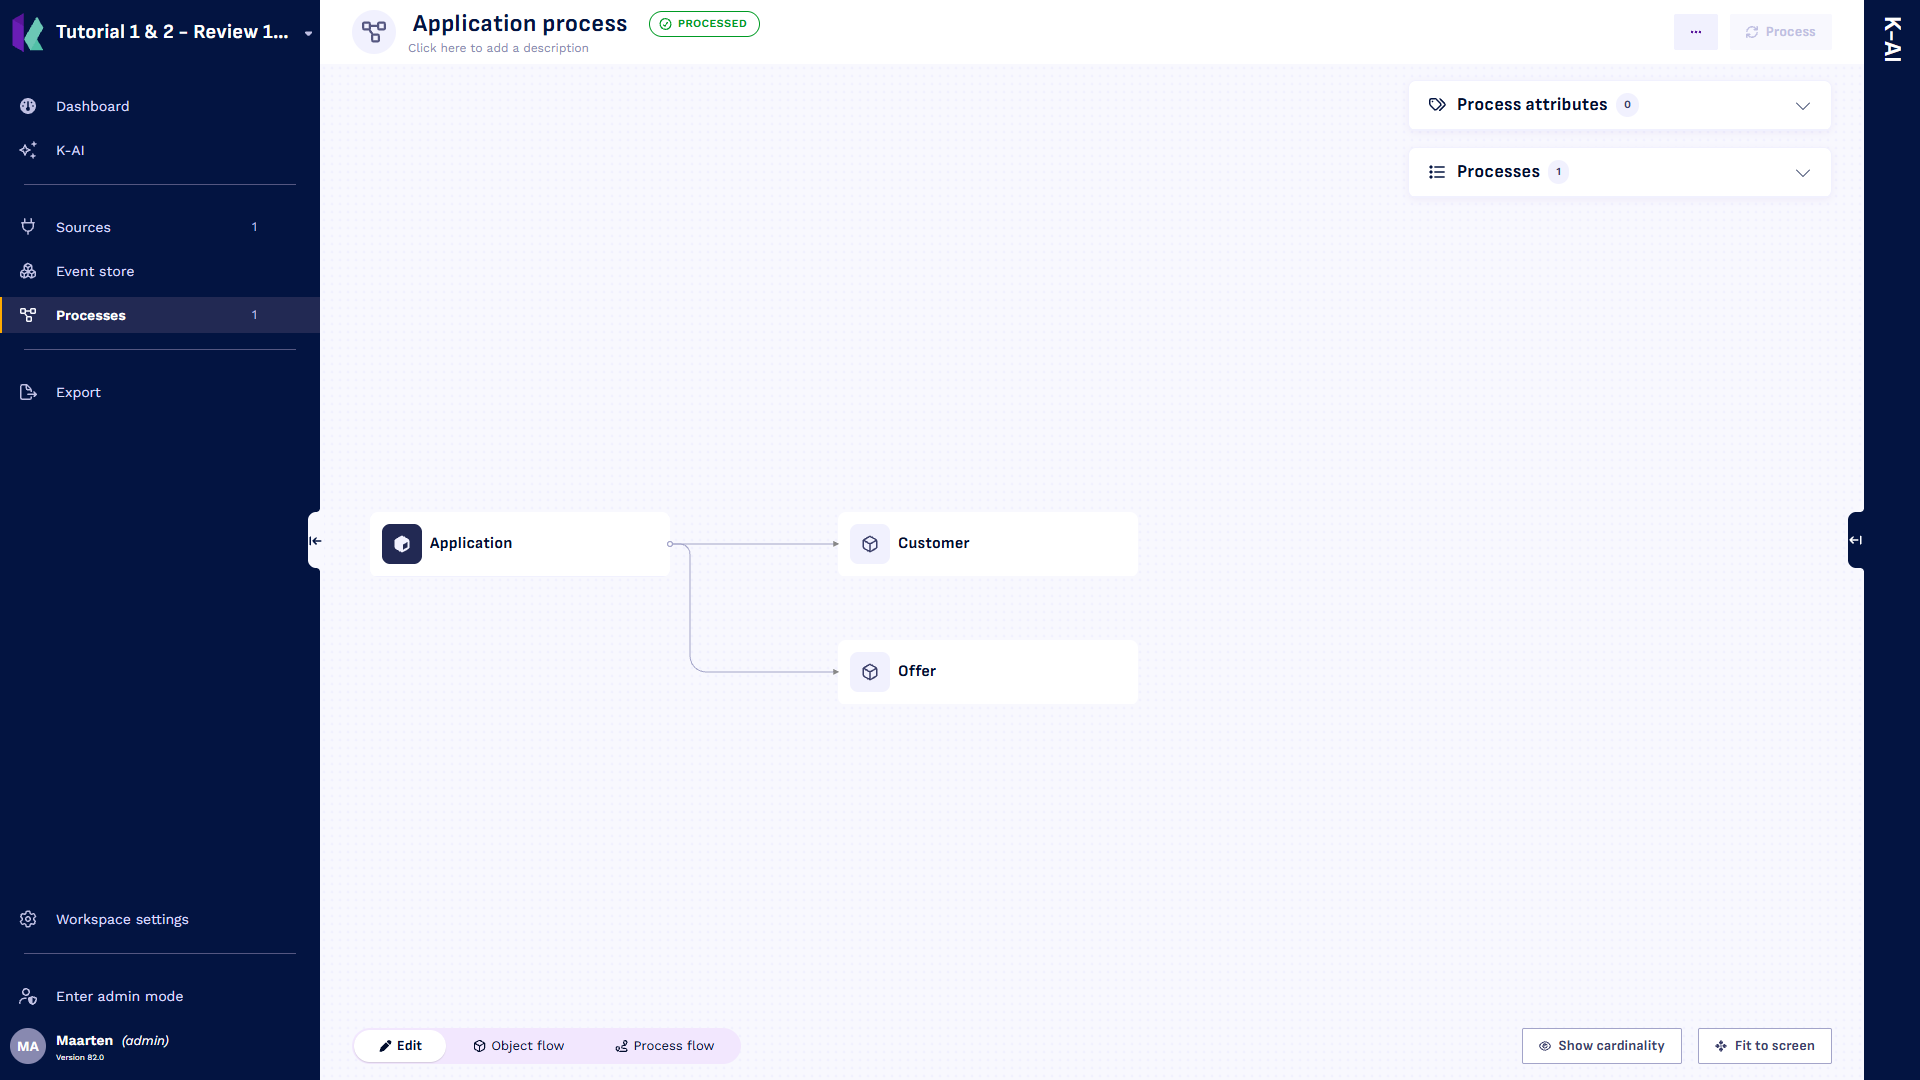
- Choose Application as the leading object. The process is named Application process automatically; you can rename it later.
- Select the + on the Application node and choose Customer. Repeat for Offer.

- Select Process and wait until the status shows Processed.
The Application process now looks like this:
Step 4: Download the event log
A CSV export is the quickest way to check your output while you build.
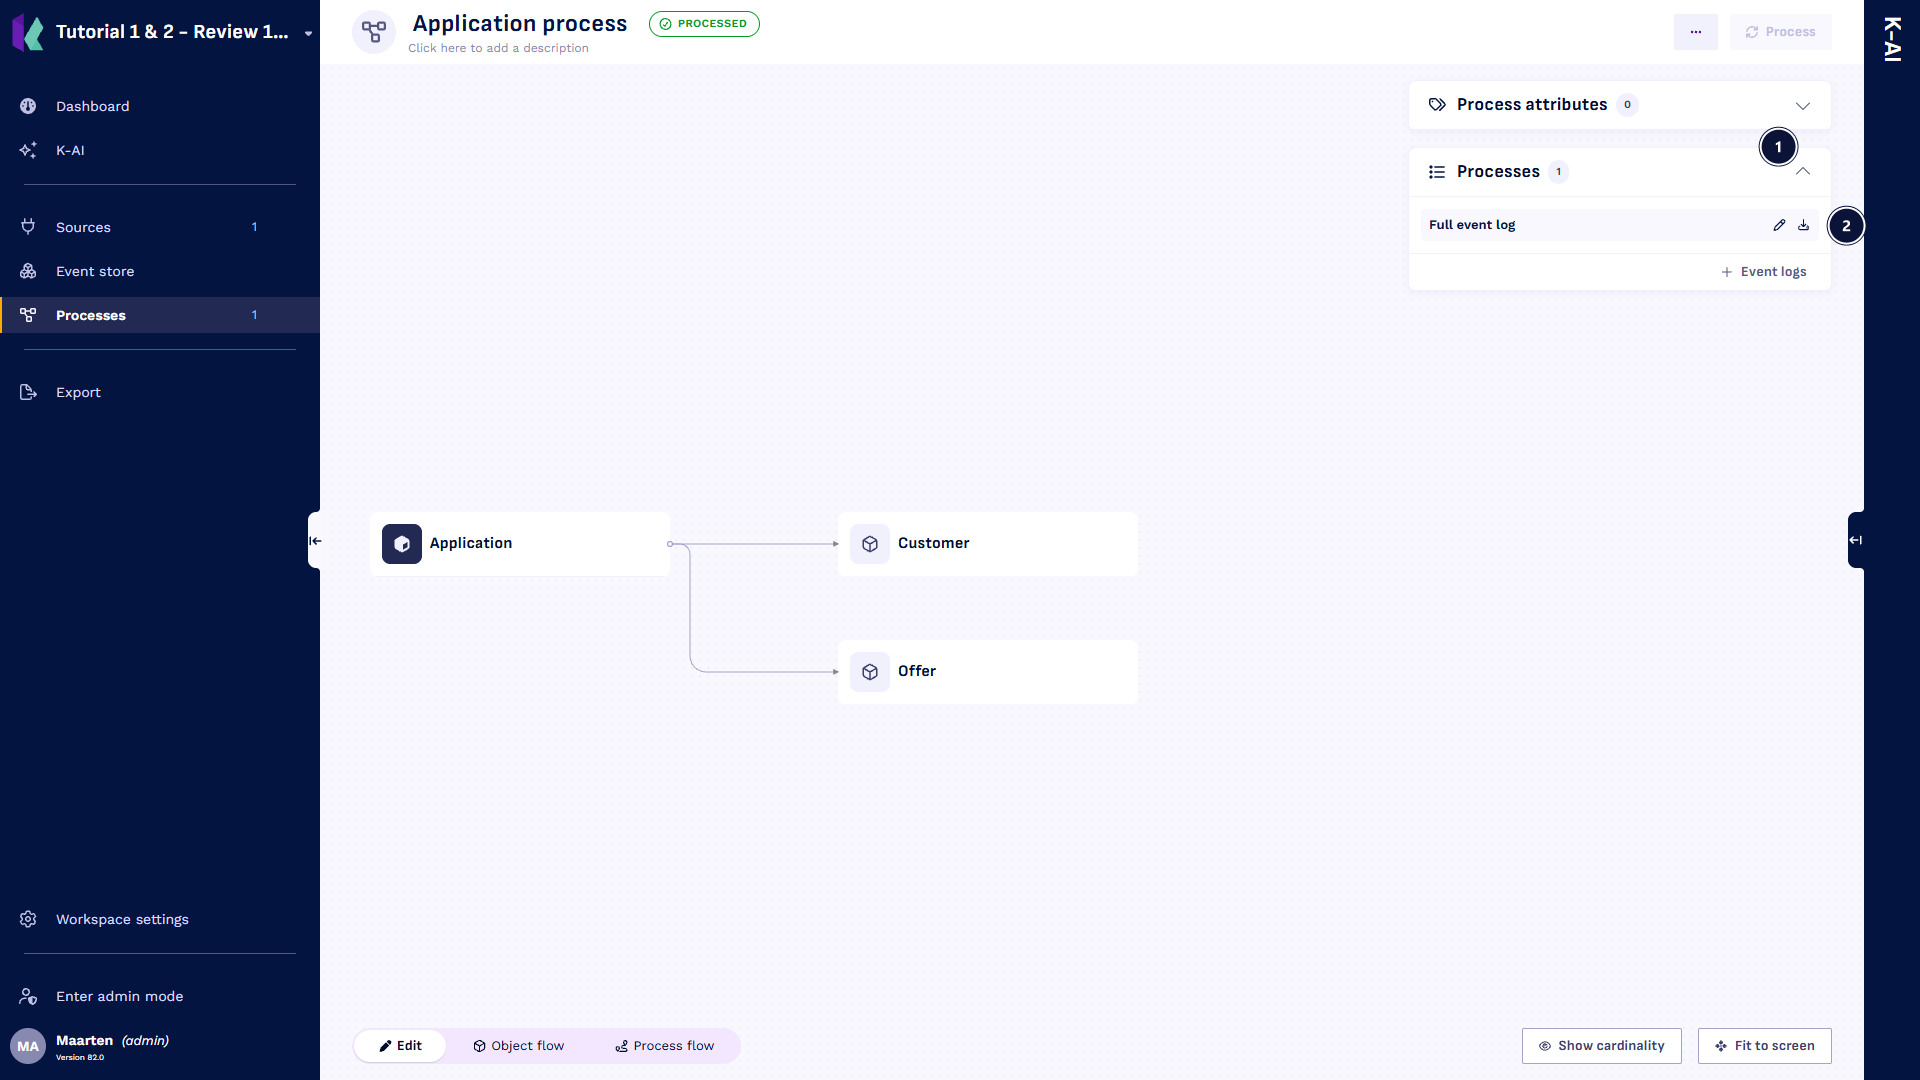
- Open the Event logs panel on the right with its chevron.
- Hover over Full event log and select the download icon.
- Open the downloaded zip file, Full event log.zip. It contains the event log
Fulleventlog.csvand the case tableApplication.csv.
You have created your first event log in Konekti. Learn how to add your own objects and activities in Building the data model.
Try a second process with Customer as the leading object to see customers with more than one loan application.