2. Building the data model
In this tutorial you extend the event store from the Fast track by hand. You add the Background check object with two activities, add an activity from a workflow table, and bring both into the Application process. You keep working in the workspace Tutorial 1 & 2 - your user name.
Step 1: Add a new object
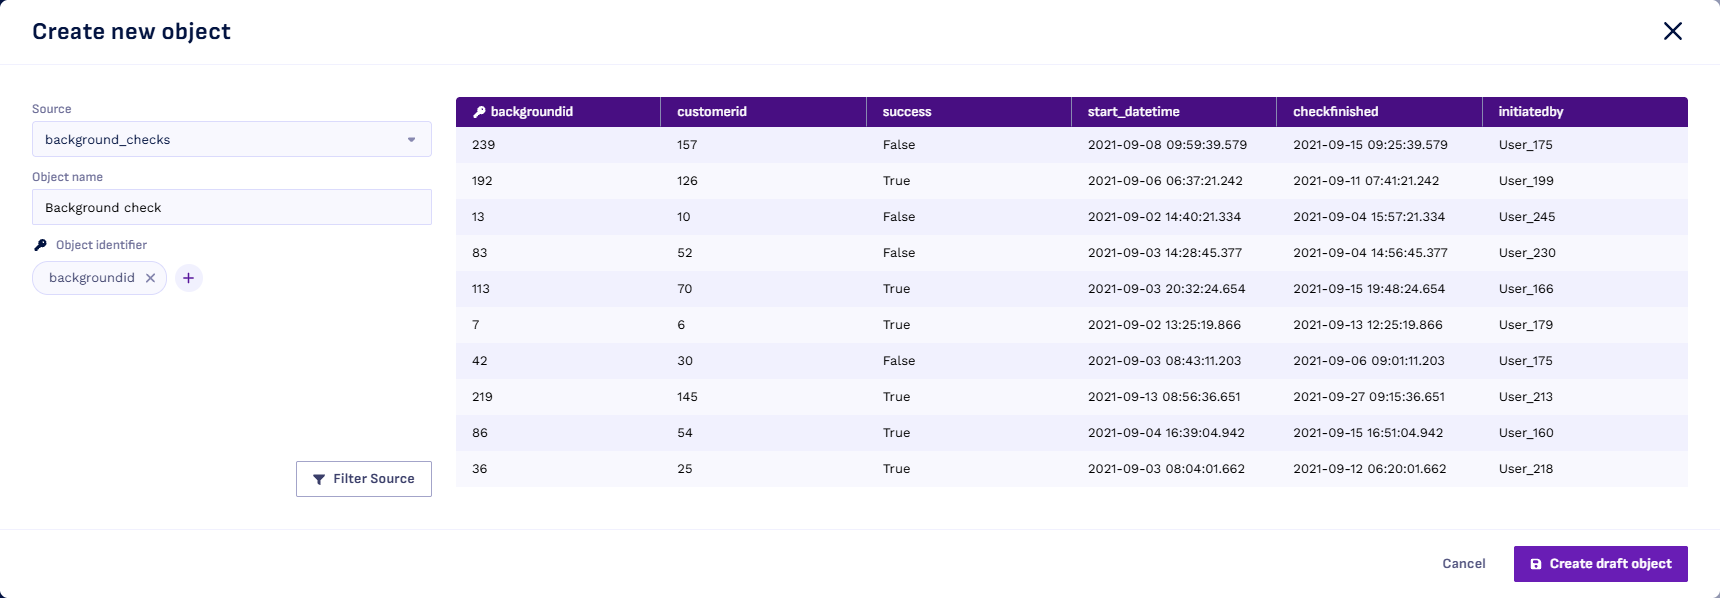
- Select Event store in the sidebar, then + Object.
- Fill in the Create new object dialog:
- Source: File uploads →
background_checks - Object name: Background check
- Object identifier: select Select column and choose
backgroundid
- Source: File uploads →
- Select Create draft object.
Step 2: Configure the object
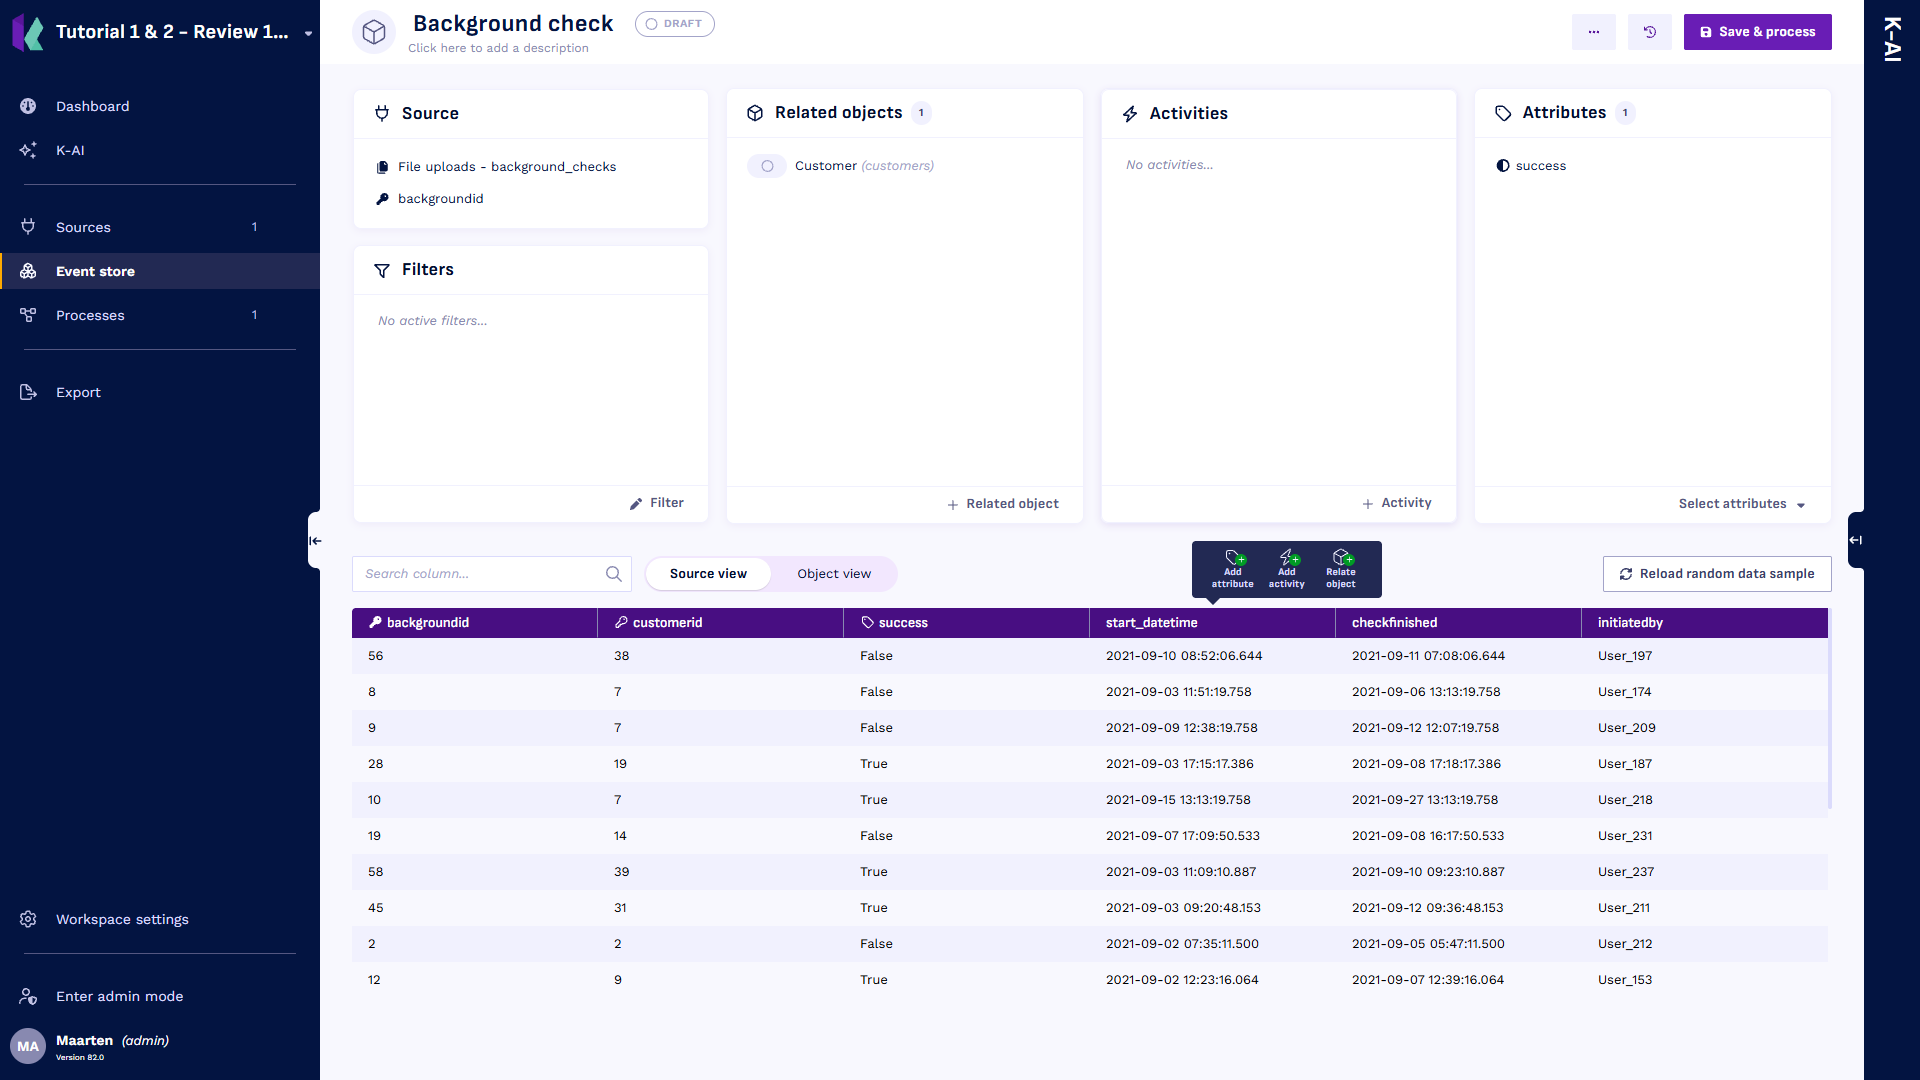
The object page opens. The source table is shown at the bottom; hover over a column header to see Add attribute, Add activity and Relate object.
- Hover over
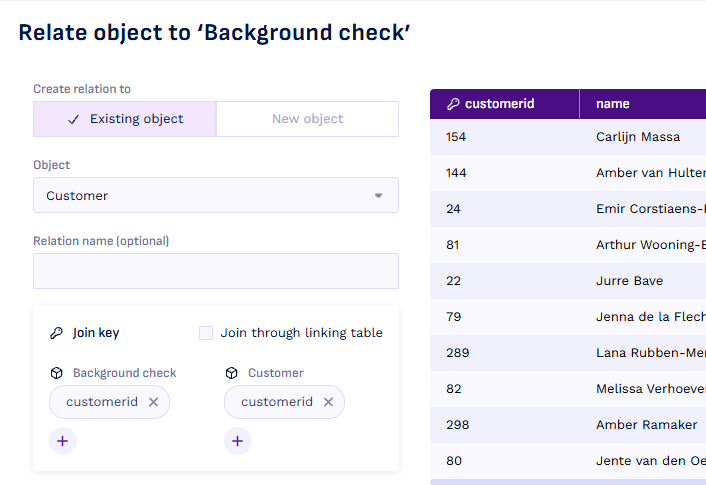
customeridand select Relate object. - Under Object, choose Customer. The Background check join key is filled in already;
under Customer, select Select column and choose
customerid. - Select Create relation.
- Hover over
successand select Add attribute.
Step 3: Add activities from the object table
Timestamp columns in the object table can become activities directly.
- Hover over
start_datetimeand select Add activity. The Relate activity to 'Background check' dialog opens with the timestamp filled in. - Enter Start background check as the Activity name and select
Create draft activity.
- Open Start background check from the Activities panel.
- Hover over
initiatedbyand select Add attribute. - Rename the attribute to Resource: hover over
initiatedbyin the Attributes panel and select the pen icon. In Attribute name, choose Resource from the list, which shows names already used in the event store, and select Save attribute. - Select Save & process.
- Go back to Background check through the Related objects panel and repeat steps 1
to 6 for
checkfinished, with the name Finish background check. - On Background check, select Save & process.
Step 4: Add an activity from the workflow table
Activities do not have to come from the object's own table. See Activities for the ways activities can be stored.
- Select Event store in the sidebar. The Table column shows that the Application
activities come from
application_headerandapplication_status_history. - Select Sources in the sidebar. The table
application_workflowshows the status Not in use; select it to preview its contents. - Go back to the Event store and select + Activity.
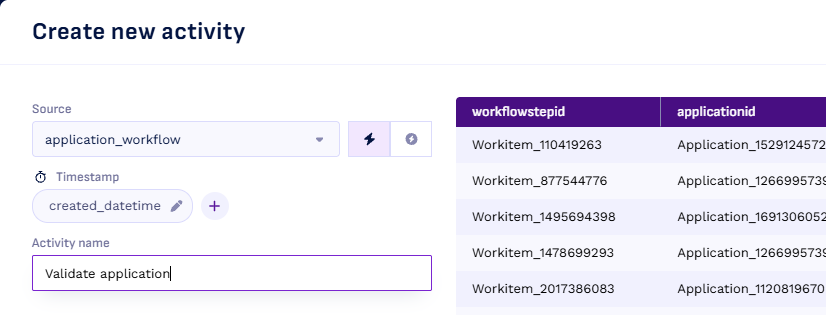
- Fill in the Create new activity dialog and select Create draft activity:
- Source: File uploads →
application_workflow - Timestamp:
created_datetime - Activity name: Validate application
- Source: File uploads →
- In the Filters panel, select Filter. Set
workflowstepEqualsValidate application, select + Filter, and setlifecycleEqualscomplete. Select Preview filters to check the result, then Save filters.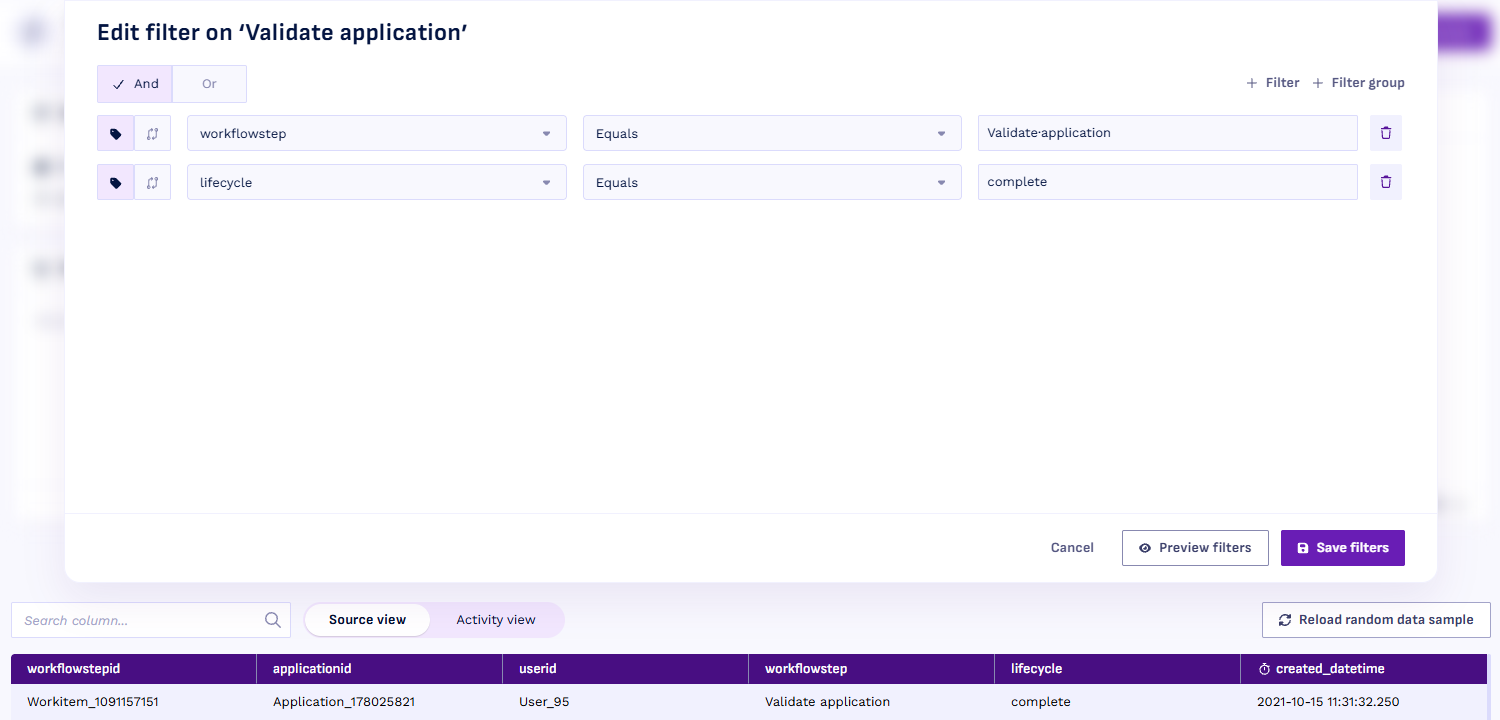
- Hover over
userid, select Add attribute, and rename it to Resource as in step 3. - Hover over
applicationidand select Relate object. Under Object, choose Application; under Application, chooseapplicationid. Select Create relation.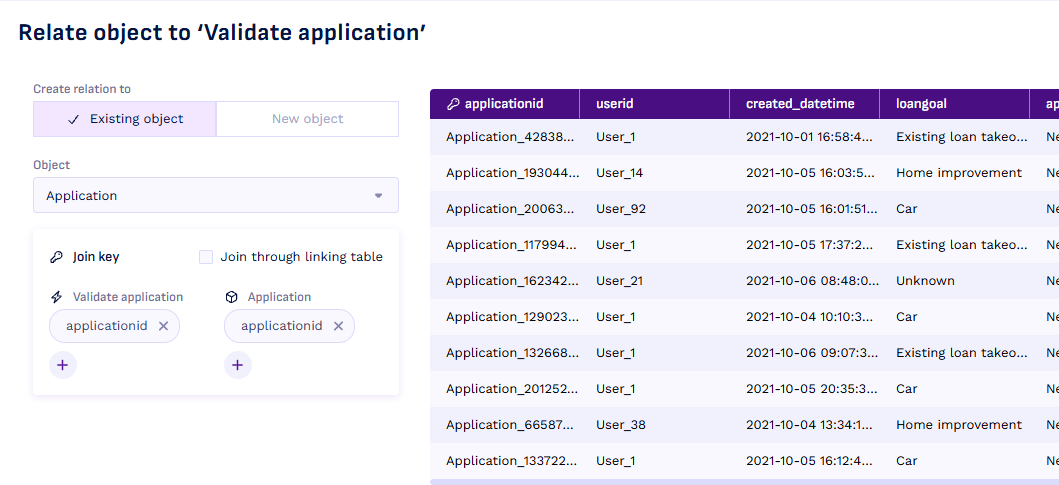
- Select Save & process.
Step 5: Add the new object to the process
- Select Processes in the sidebar and open Application process.
- Select the + on the Customer node and choose Background check.
- Select Process and wait until the status shows Processed. The process shows a warning banner while it has unprocessed changes.
- Switch to Process flow to see Start background check, Finish background check and Validate application in the flow.
Your event log now includes the new object and activities. The next tutorial goes deeper into processes.