Database
With the database source, you can set up a connection to a database schema of your choice.
info
Creating a database source does not automatically load tables into Konekti; data is materialized in Konekti when you process an object or activity in the event store (see Build the Event Store).
Supported Database Types
Konekti currently supports the following database connections:
- MSSQL
- PostgreSQL
- Synapse Analytics SQL Endpoint
- Microsoft Fabric SQL Endpoint
tip
To set up a Synapse Analytics / Microsoft Fabric SQL Endpoint, follow the steps in Setting up SQL endpoints
Create a Database Source in Four Steps
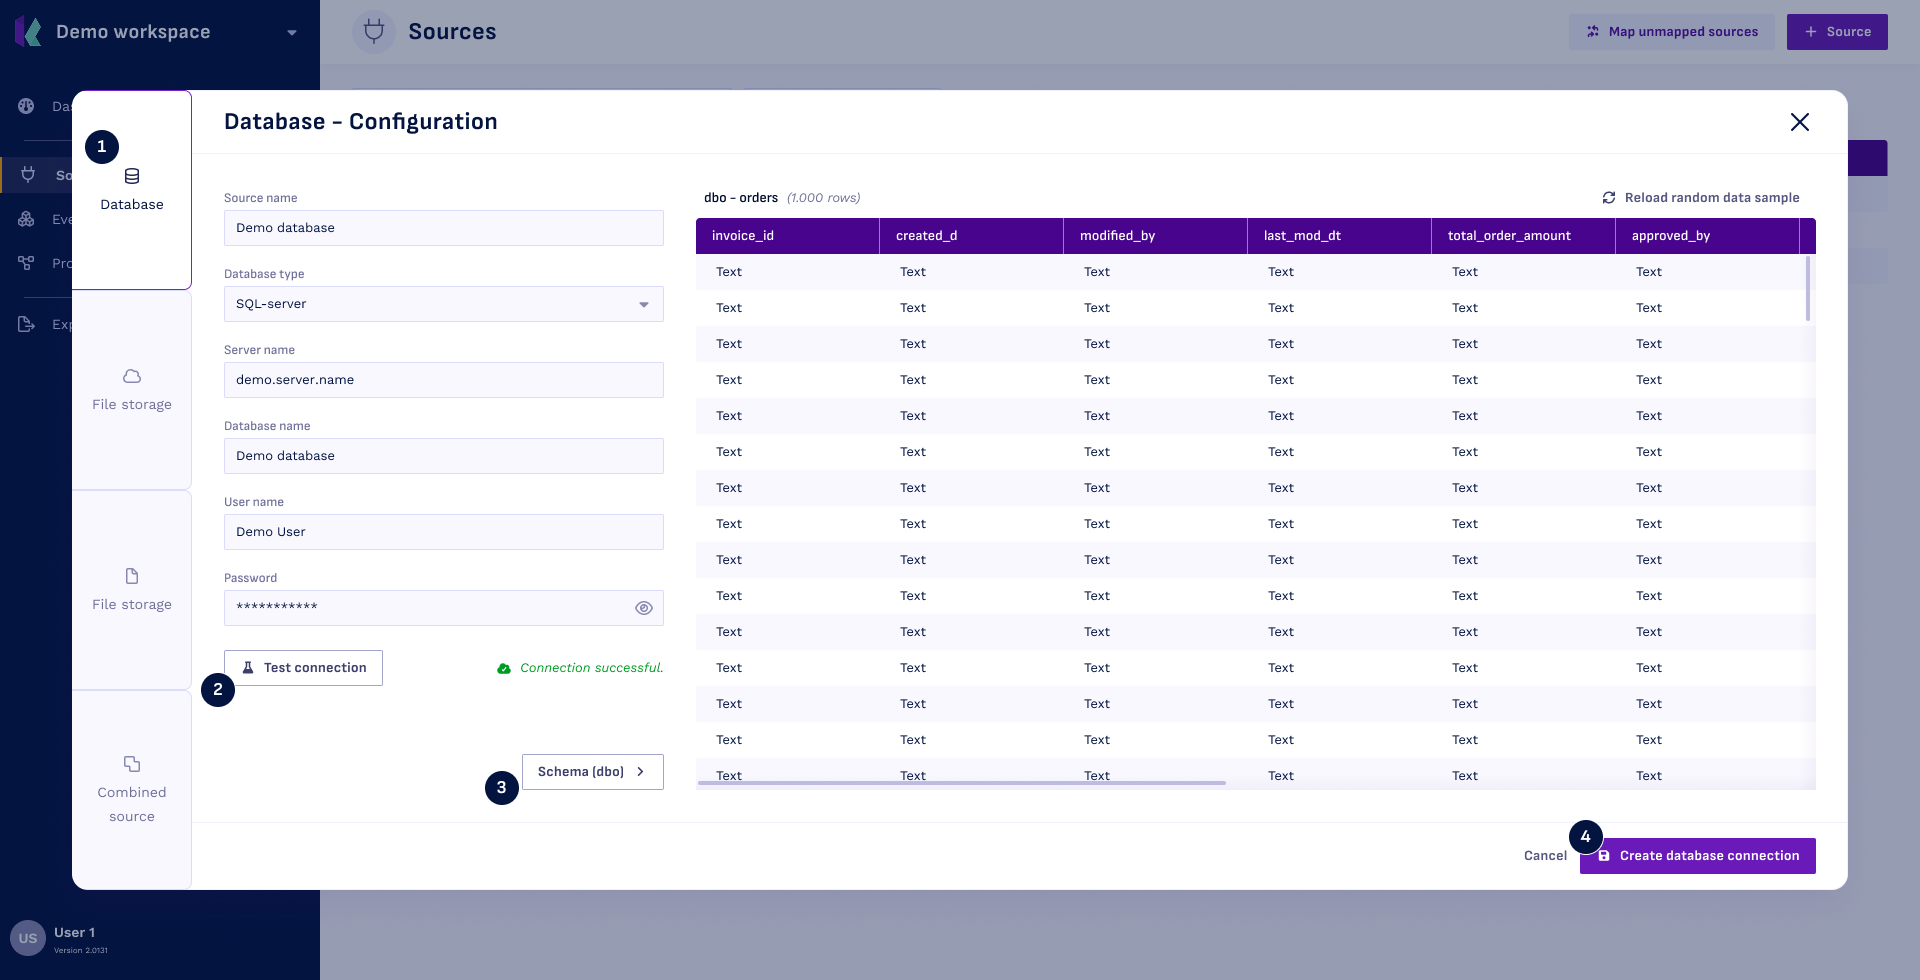
Step 1: Start Creating a New Source
- Go to the Sources overview page.
- Click + Source.
- Select Database from the sidebar.
Step 2: Set up Database Connection
- Fill in the✅ connection details.
- Click Test database connection to verify connectivity.
Field Requirements by Database Type:
| Database Type | Server Name | Database Name | Username | Password | Client Id | Client Secret |
|---|---|---|---|---|---|---|
| MSSQL | ✅ | ✅ | ✅ | ✅ | ❌ | ❌ |
| PostgreSQL | ✅ | ✅ | ✅ | ✅ | ❌ | ❌ |
| Synapse Analytics SQL Endpoint | ✅ | ✅ | ❌ | ❌ | ✅ | ✅ |
| Microsoft Fabric SQL Endpoint | ✅ | ✅ | ❌ | ❌ | ✅ | ✅ |
Step 3: Select Database Schema
If your database has only one schema, it will be auto-selected. Otherwise:
- Click Schema >
- Select the correct schema.
tip
Use the table preview function to verify that you've selected the right schema.
Step 4: Finalize Database Source
- Complete the creation by clicking Create database connection.
Connection Fields Explained:
| Field | Description |
|---|---|
| Source name | A name used throughout Konekti to identify this source |
| Database type | The type of database you want to connect to (choose from the supported options) |
| Server name | The host address of your database server. For example, host.docker.internal,1433 for a local server, or databases.cd5ivzmnsxvm.eu-west-2.rds.amazonaws.com for a cloud instance |
| Database name | The name of the target database on the specified server |
| Username | The username with the necessary permissions to access the database |
| Password | The corresponding password for the provided username |
| Client Id | For Azure SQL Endpoint-based databases, enter the Application (client) ID of your Azure Service Principal. You can obtain this ID by following the instructions in the Setting Up an Azure Service Principal section. Steps to obtain Client Id: 1. Navigate to the Azure Portal. 2. Go to Azure Active Directory > App registrations. 3. Select your registered application. 4. Copy the Application (client) ID from the overview page. |
| Client Secret | For Azure SQL Endpoint-based databases, enter the Client Secret of your Azure Service Principal. Follow the steps in the Setting Up an Azure Service Principal section to generate a new Client Secret. Steps to obtain Client Secret: 1. In your registered application, navigate to Certificates & secrets. 2. Click New client secret. 3. Add a description and set an expiration period. 4. Click Add and copy the Value immediately. |